How To Reassign Session Notes to a Different Client
Last updated: August 26, 2026
If a session note was created under the wrong client, you can move it to the correct client in a few clicks. Reassigning keeps the note and its contents intact and simply moves it to the right client's profile, so your documentation stays accurate and organized.
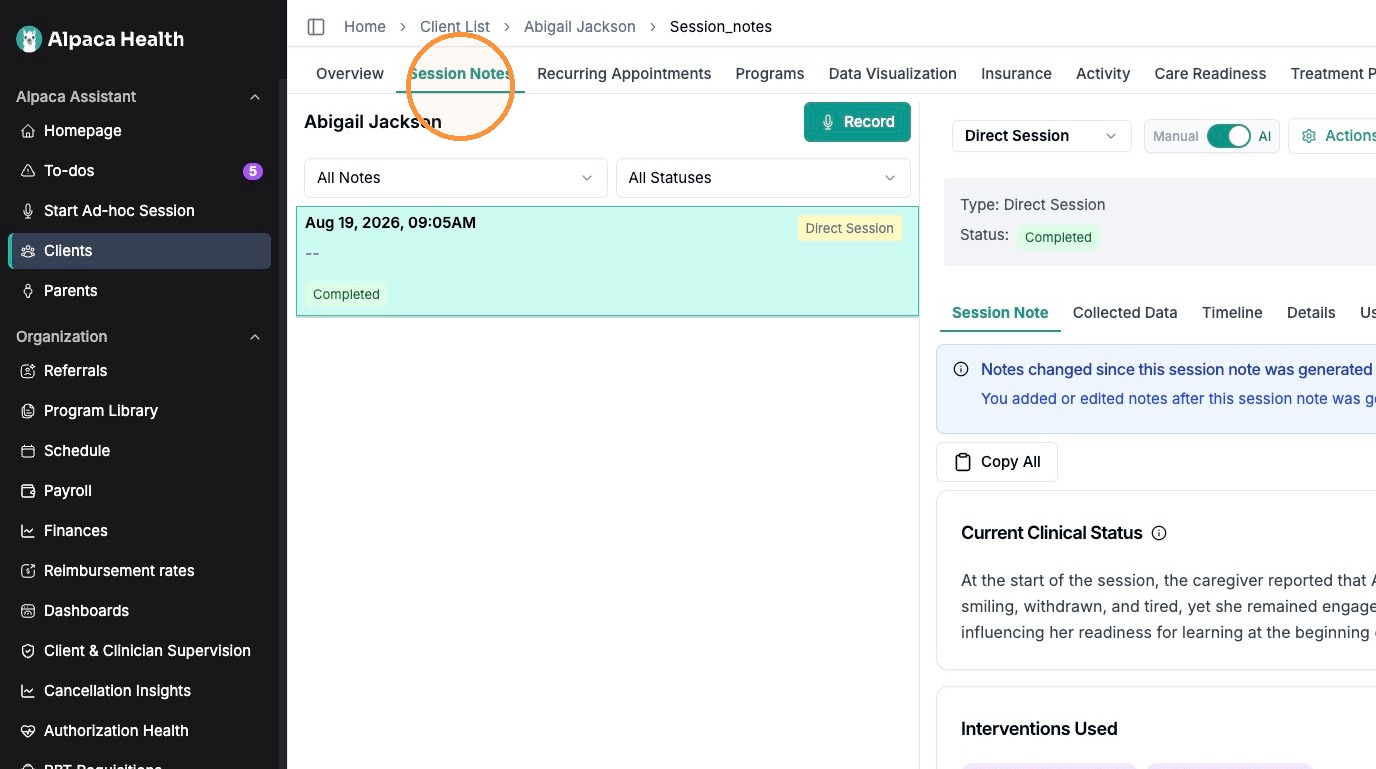
Open the client's session notes. In the left menu, go to Clients and open the client the note is currently filed under. Select the Session Notes tab, then click the session note you need to move.
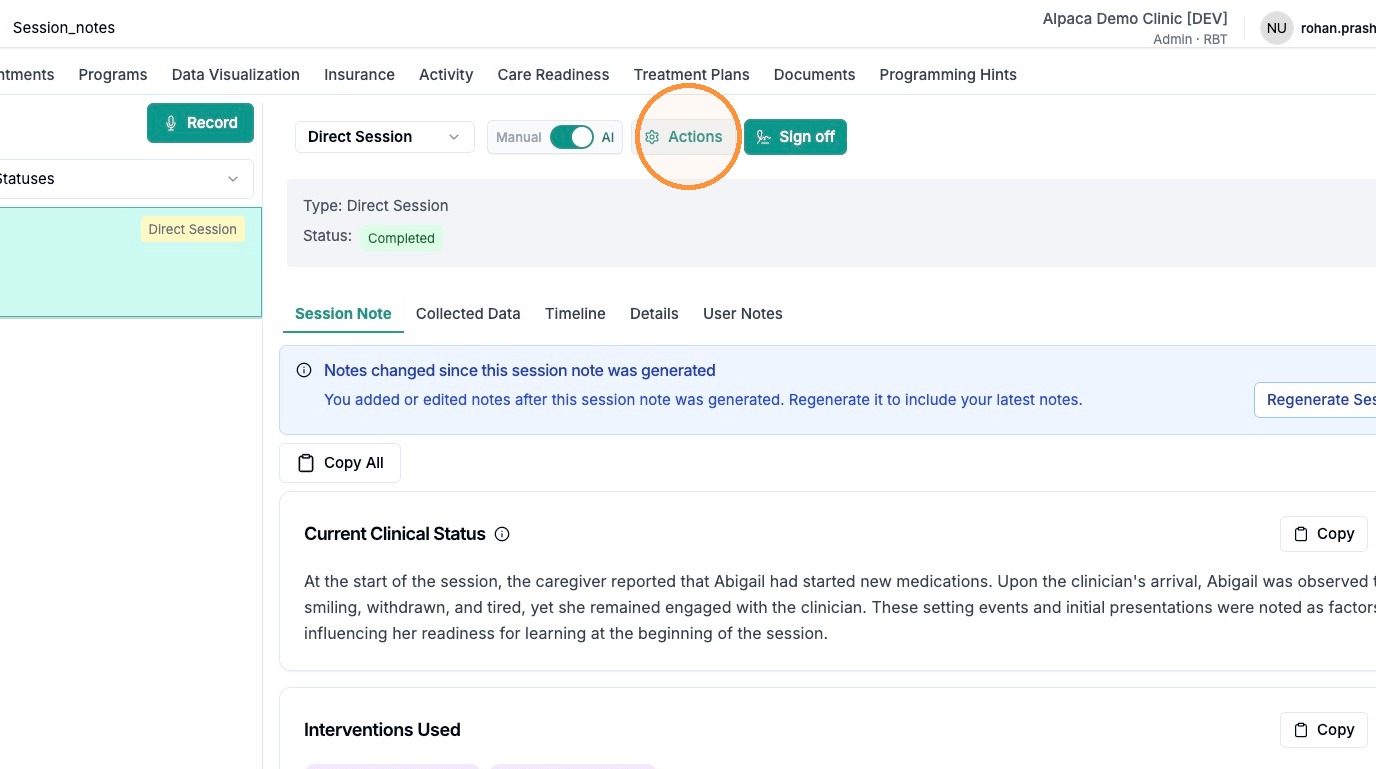
Open the Actions menu. With the note open, click Actions in the top right of the note (just to the left of the Sign off button).
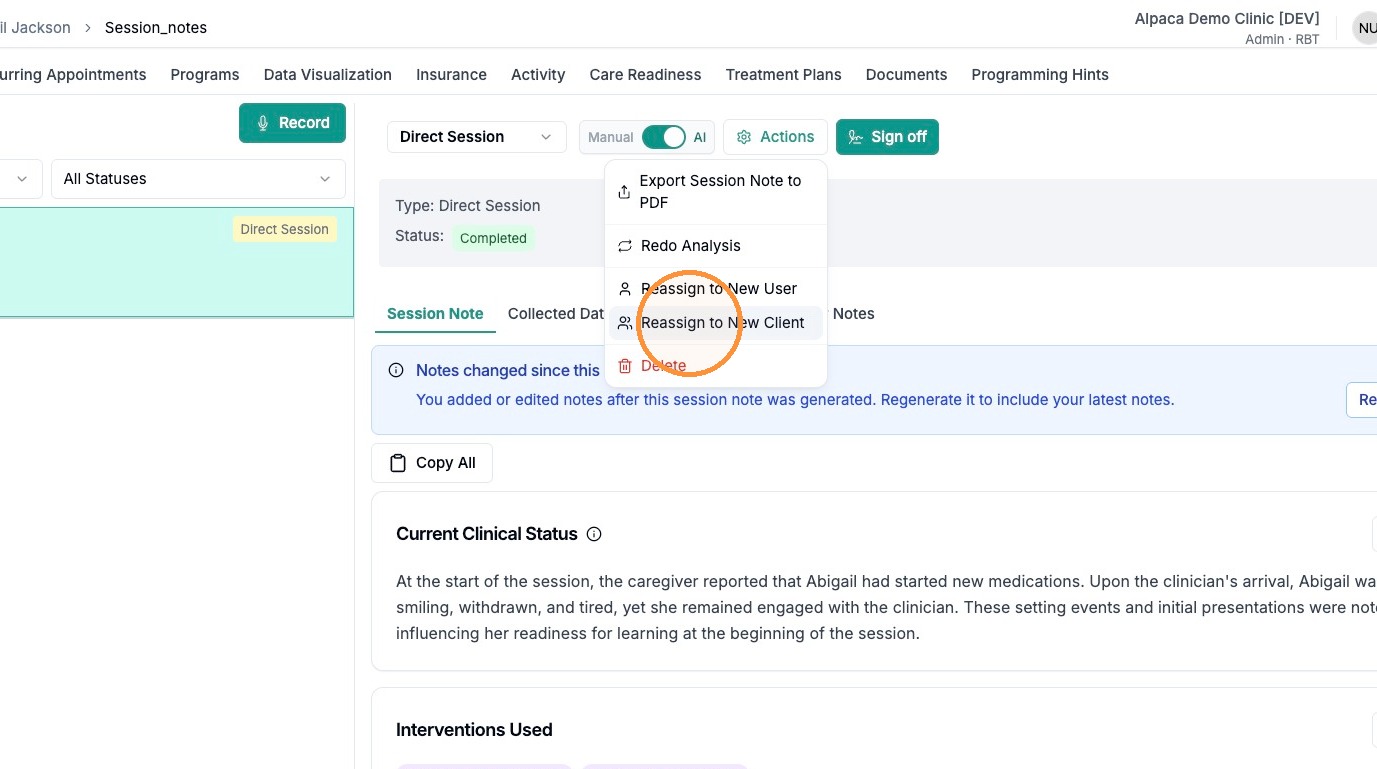
Click "Reassign to New Client." In the dropdown that appears, choose Reassign to New Client. Note the option right above it, Reassign to New User, changes the clinician instead, so be sure to pick Client.
Choose the correct client. In the Reassign Session Note window, type the client's name in the Search clients box, then check the box next to the correct client. You can only reassign to one client at a time.

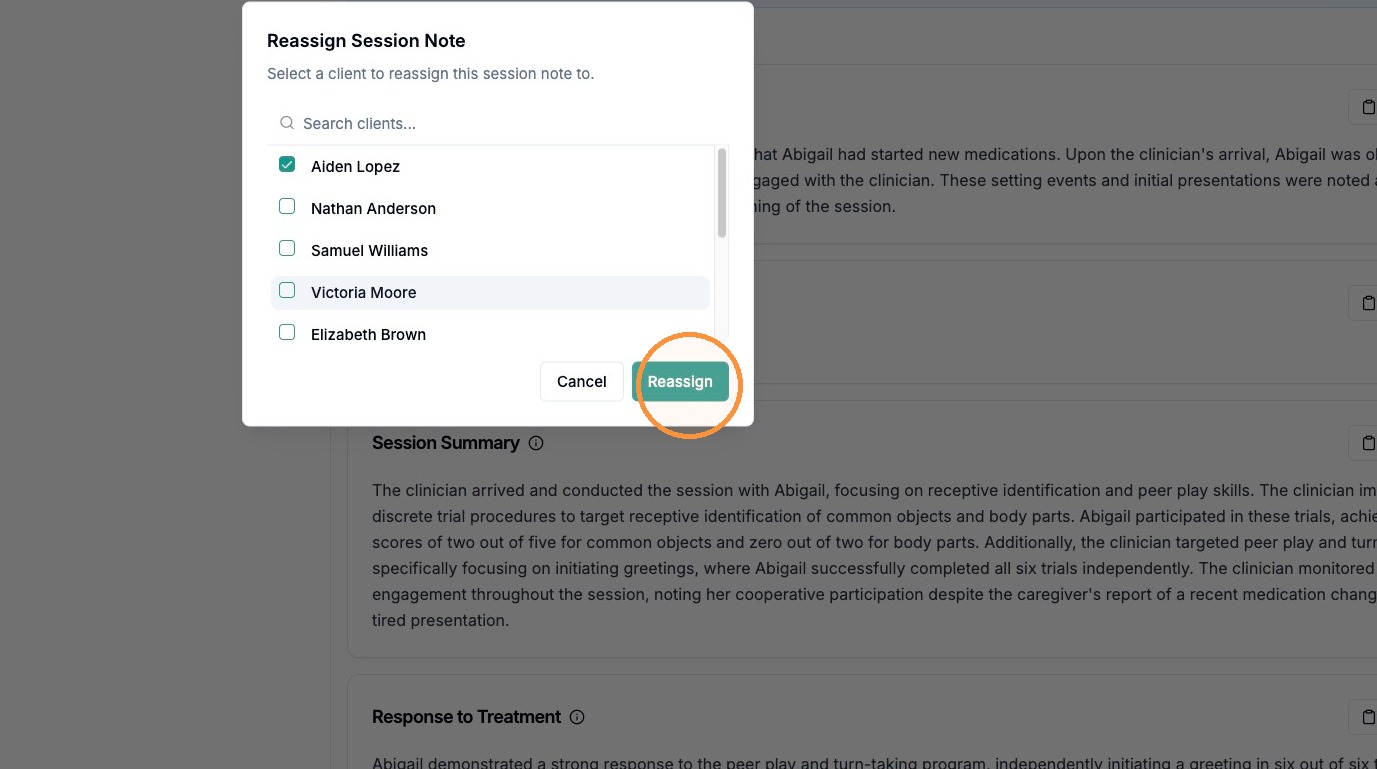
Click "Reassign" to confirm. Once a client is selected, the Reassign button turns green. Click it to finish. The note now appears under the correct client's profile. If you ever pick the wrong client, just open the Actions menu again and reassign it.