Exporting or Sharing a Session Note as a PDF
Last updated: August 26, 2026
Alpaca lets you turn any session note into a clean, print-ready PDF. The exported file is a formatted copy of the note — the client and session details, the ABA interventions used, the full note body, and the client's insurance details. Use it when you need to share a note outside Alpaca, hand a copy to a supervisor or payer, keep an offline record, or attach it elsewhere. Exporting never changes or moves the note; it only creates a downloadable copy.
Where this lives
You export from an individual session note inside a client's profile. So the first thing you do is open the client, go to their Session Notes, and open the specific note you want.
Step 1 — Open the client's Session Notes
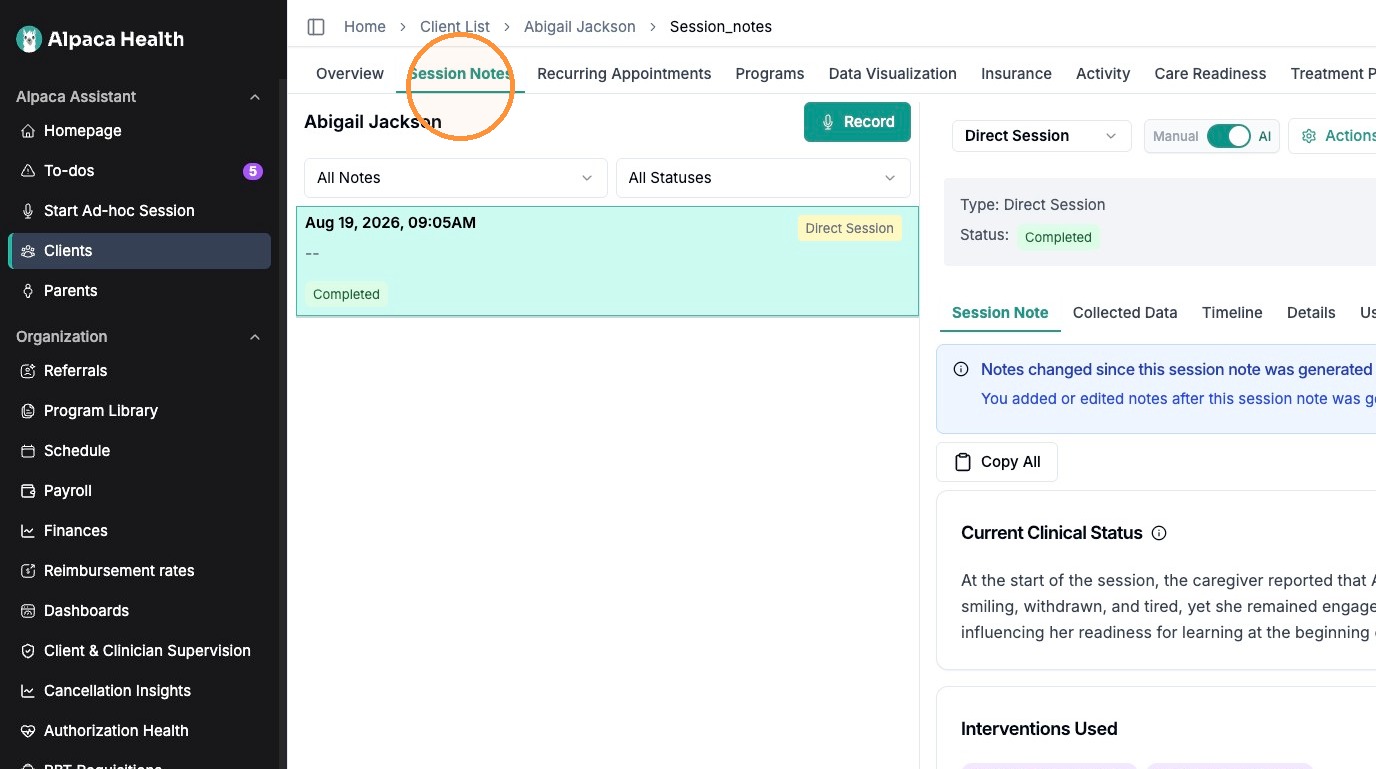
In the left sidebar, click “Clients” and open the client whose note you want (here, Abigail Jackson). Along the top of the client's profile is a row of tabs (Overview, Session Notes, Recurring Appointments, and so on). Click the “Session Notes” tab.
That tab lists every session note recorded for this client.
Step 2 — Select the note you want to export
In the list on the left, click the note you want. Each note is labeled with its date and time, its session type (for example, “Direct Session”), and its status (for example, “Completed”). When you click a note, its details open in the panel on the right.
Tip: if the client has many notes, use the “All Notes” and “All Statuses” filters above the list to narrow things down.

Step 3 — Open the Actions menu
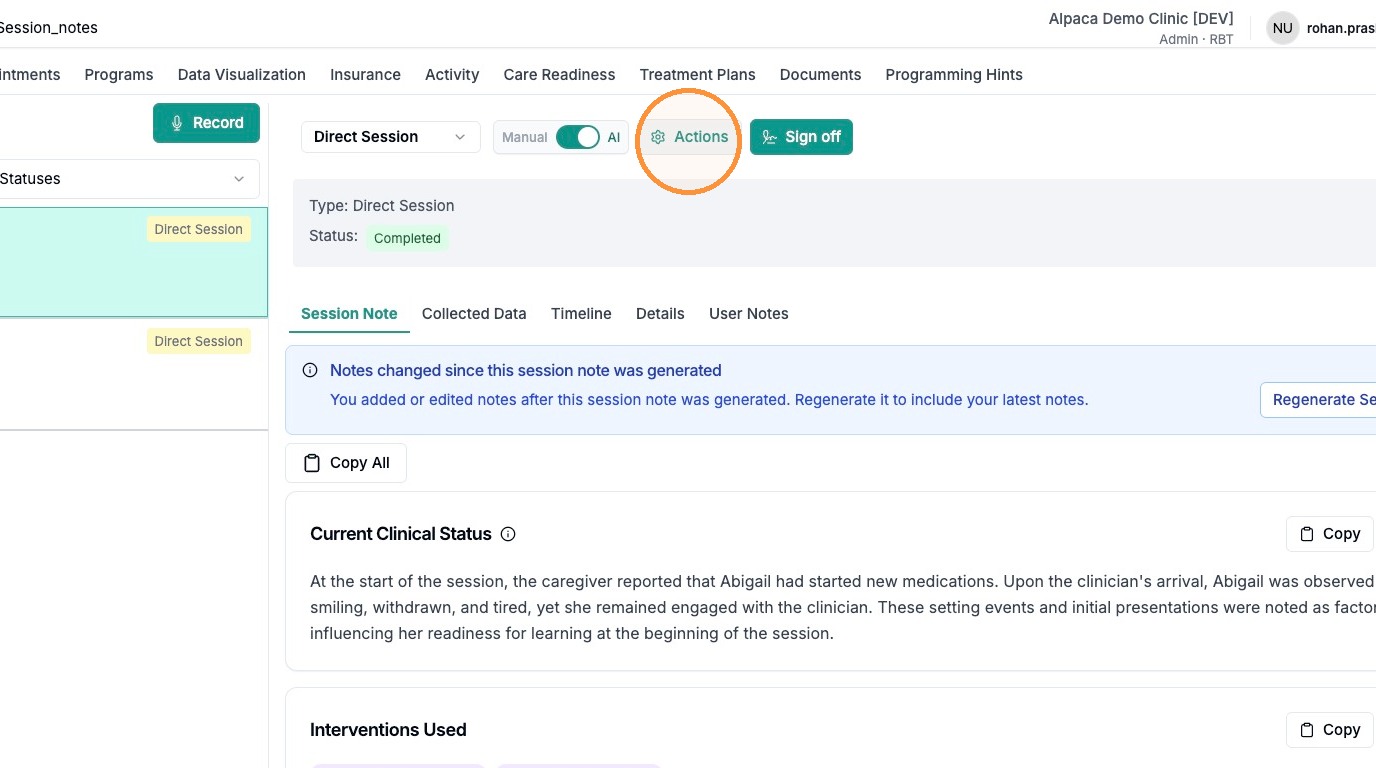
With the note open on the right, click “Actions” in the top-right of the note panel. It's the gear-icon button sitting just to the left of the green “Sign off” button.
Heads up: “Actions” and “Sign off” are two different buttons. “Sign off” finalizes and locks the note — you do not need to sign off in order to export it.
Step 4 — Choose “Export Session Note to PDF”
In the dropdown that appears, click “Export Session Note to PDF” — it's the first item in the menu.
Don't pick the wrong item. The same menu also holds “Redo Analysis,” “Reassign to New User,” “Reassign to New Client,” and “Delete.” Those regenerate, move, or remove the note. Only “Export Session Note to PDF” creates a downloadable copy while leaving the note untouched. Also don't confuse this with the “Copy All” / “Copy” buttons inside the note body — those copy text to your clipboard, they do not produce a PDF file.

Step 5 — Review the PDF preview
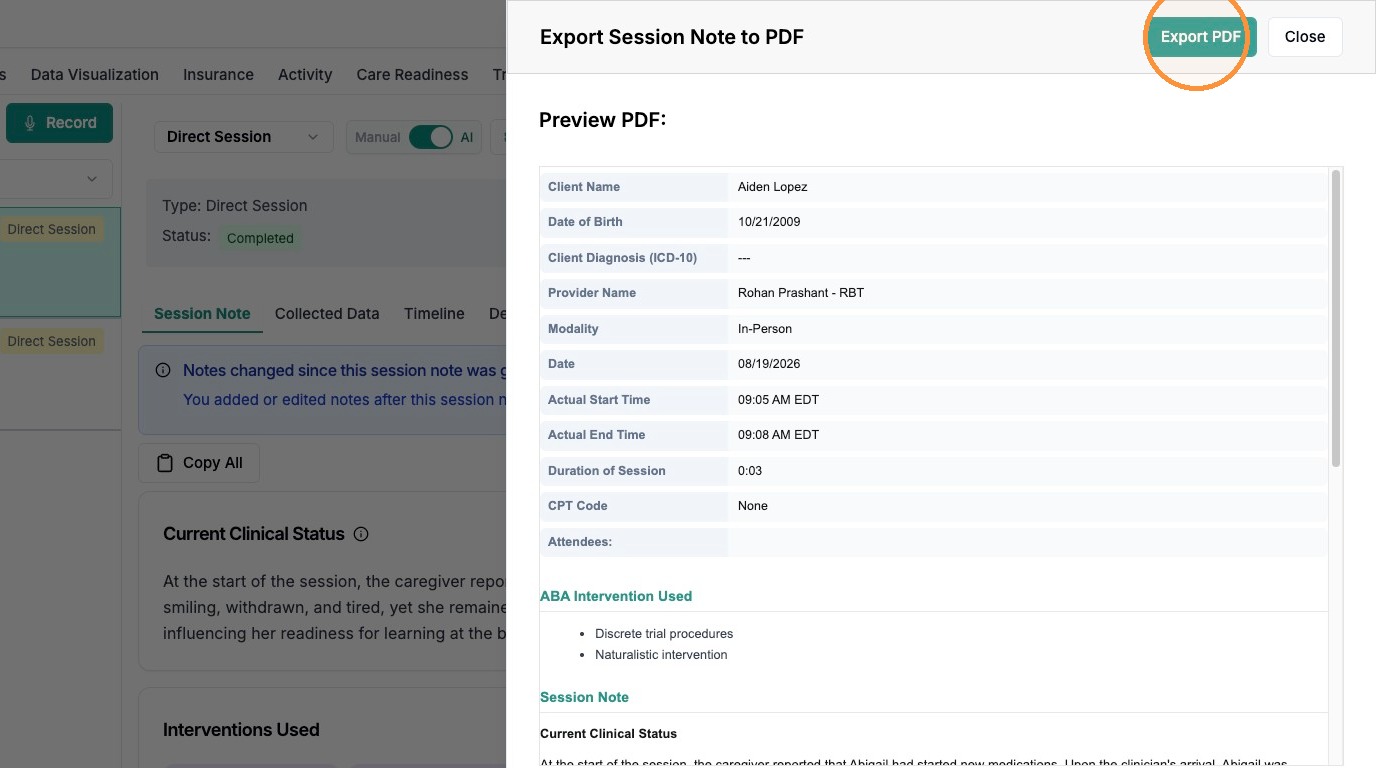
A window titled “Export Session Note to PDF” opens with a full “Preview PDF” of the note. At the top is the header table — client name, date of birth, diagnosis (ICD-10), provider name, modality, date, actual start and end times, session duration, CPT code, and attendees — followed by the ABA interventions used and the session note itself. This preview is exactly what the exported file will look like.
Step 6 — Scroll through to check everything
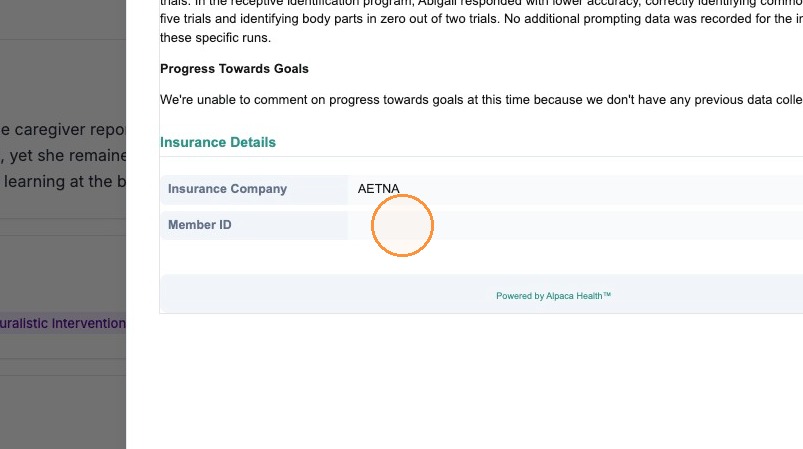
Scroll down inside the preview to read the whole note before you export it. Toward the bottom you'll find the “Insurance Details” section (insurance company and member ID) and a “Powered by Alpaca Health” footer, which marks the end of the document.
Step 7 — Export the PDF
When the preview looks right, click “Export PDF” in the top-right of the window (shown highlighted in the previous screenshot). Your browser downloads the formatted PDF to your computer, where you can save, print, or share it.
Changed your mind? Click “Close”, just to the left of “Export PDF”, to dismiss the window. Nothing is downloaded and the note stays exactly as it was.
Keep the file secure
A note on privacy: the exported PDF contains protected health information — the client's name, date of birth, diagnosis, insurance details, and clinical note. Save and share the downloaded file securely, and only with people authorized to see it.