How to Cancel an Appointment
Last updated: August 21, 2026
When a scheduled session will not happen, you can cancel it from the Schedule. Canceling records a reason, optionally notifies the client and clinician, and marks the appointment as cancelled while keeping it on the schedule (so it can be restored later if plans change). This guide uses a Direct Session as the example, but the same steps work for any appointment type.
Step 1 - Open the appointment
From the left sidebar open Schedule. Use the Daily / Weekly / 2-Week buttons and the date range to find the session. Direct Sessions appear as purple blocks showing the time, the client, and a status such as Not Started. Click the appointment you want to cancel.

Step 2 - Click Cancel in the appointment popup
A popup opens with the appointment's details: type, billing tags, location, date, time, the clinician, and the client. At the bottom, click Cancel.
Do not confuse Cancel with Delete: The Cancel button at the bottom starts a cancellation and keeps the appointment on record (marked cancelled, and reversible later). The small trash / delete icon at the top of the popup instead removes the appointment entirely. The X just closes the popup. For a normal cancellation, use the Cancel button at the bottom.

Step 3 - Choose a cancellation reason
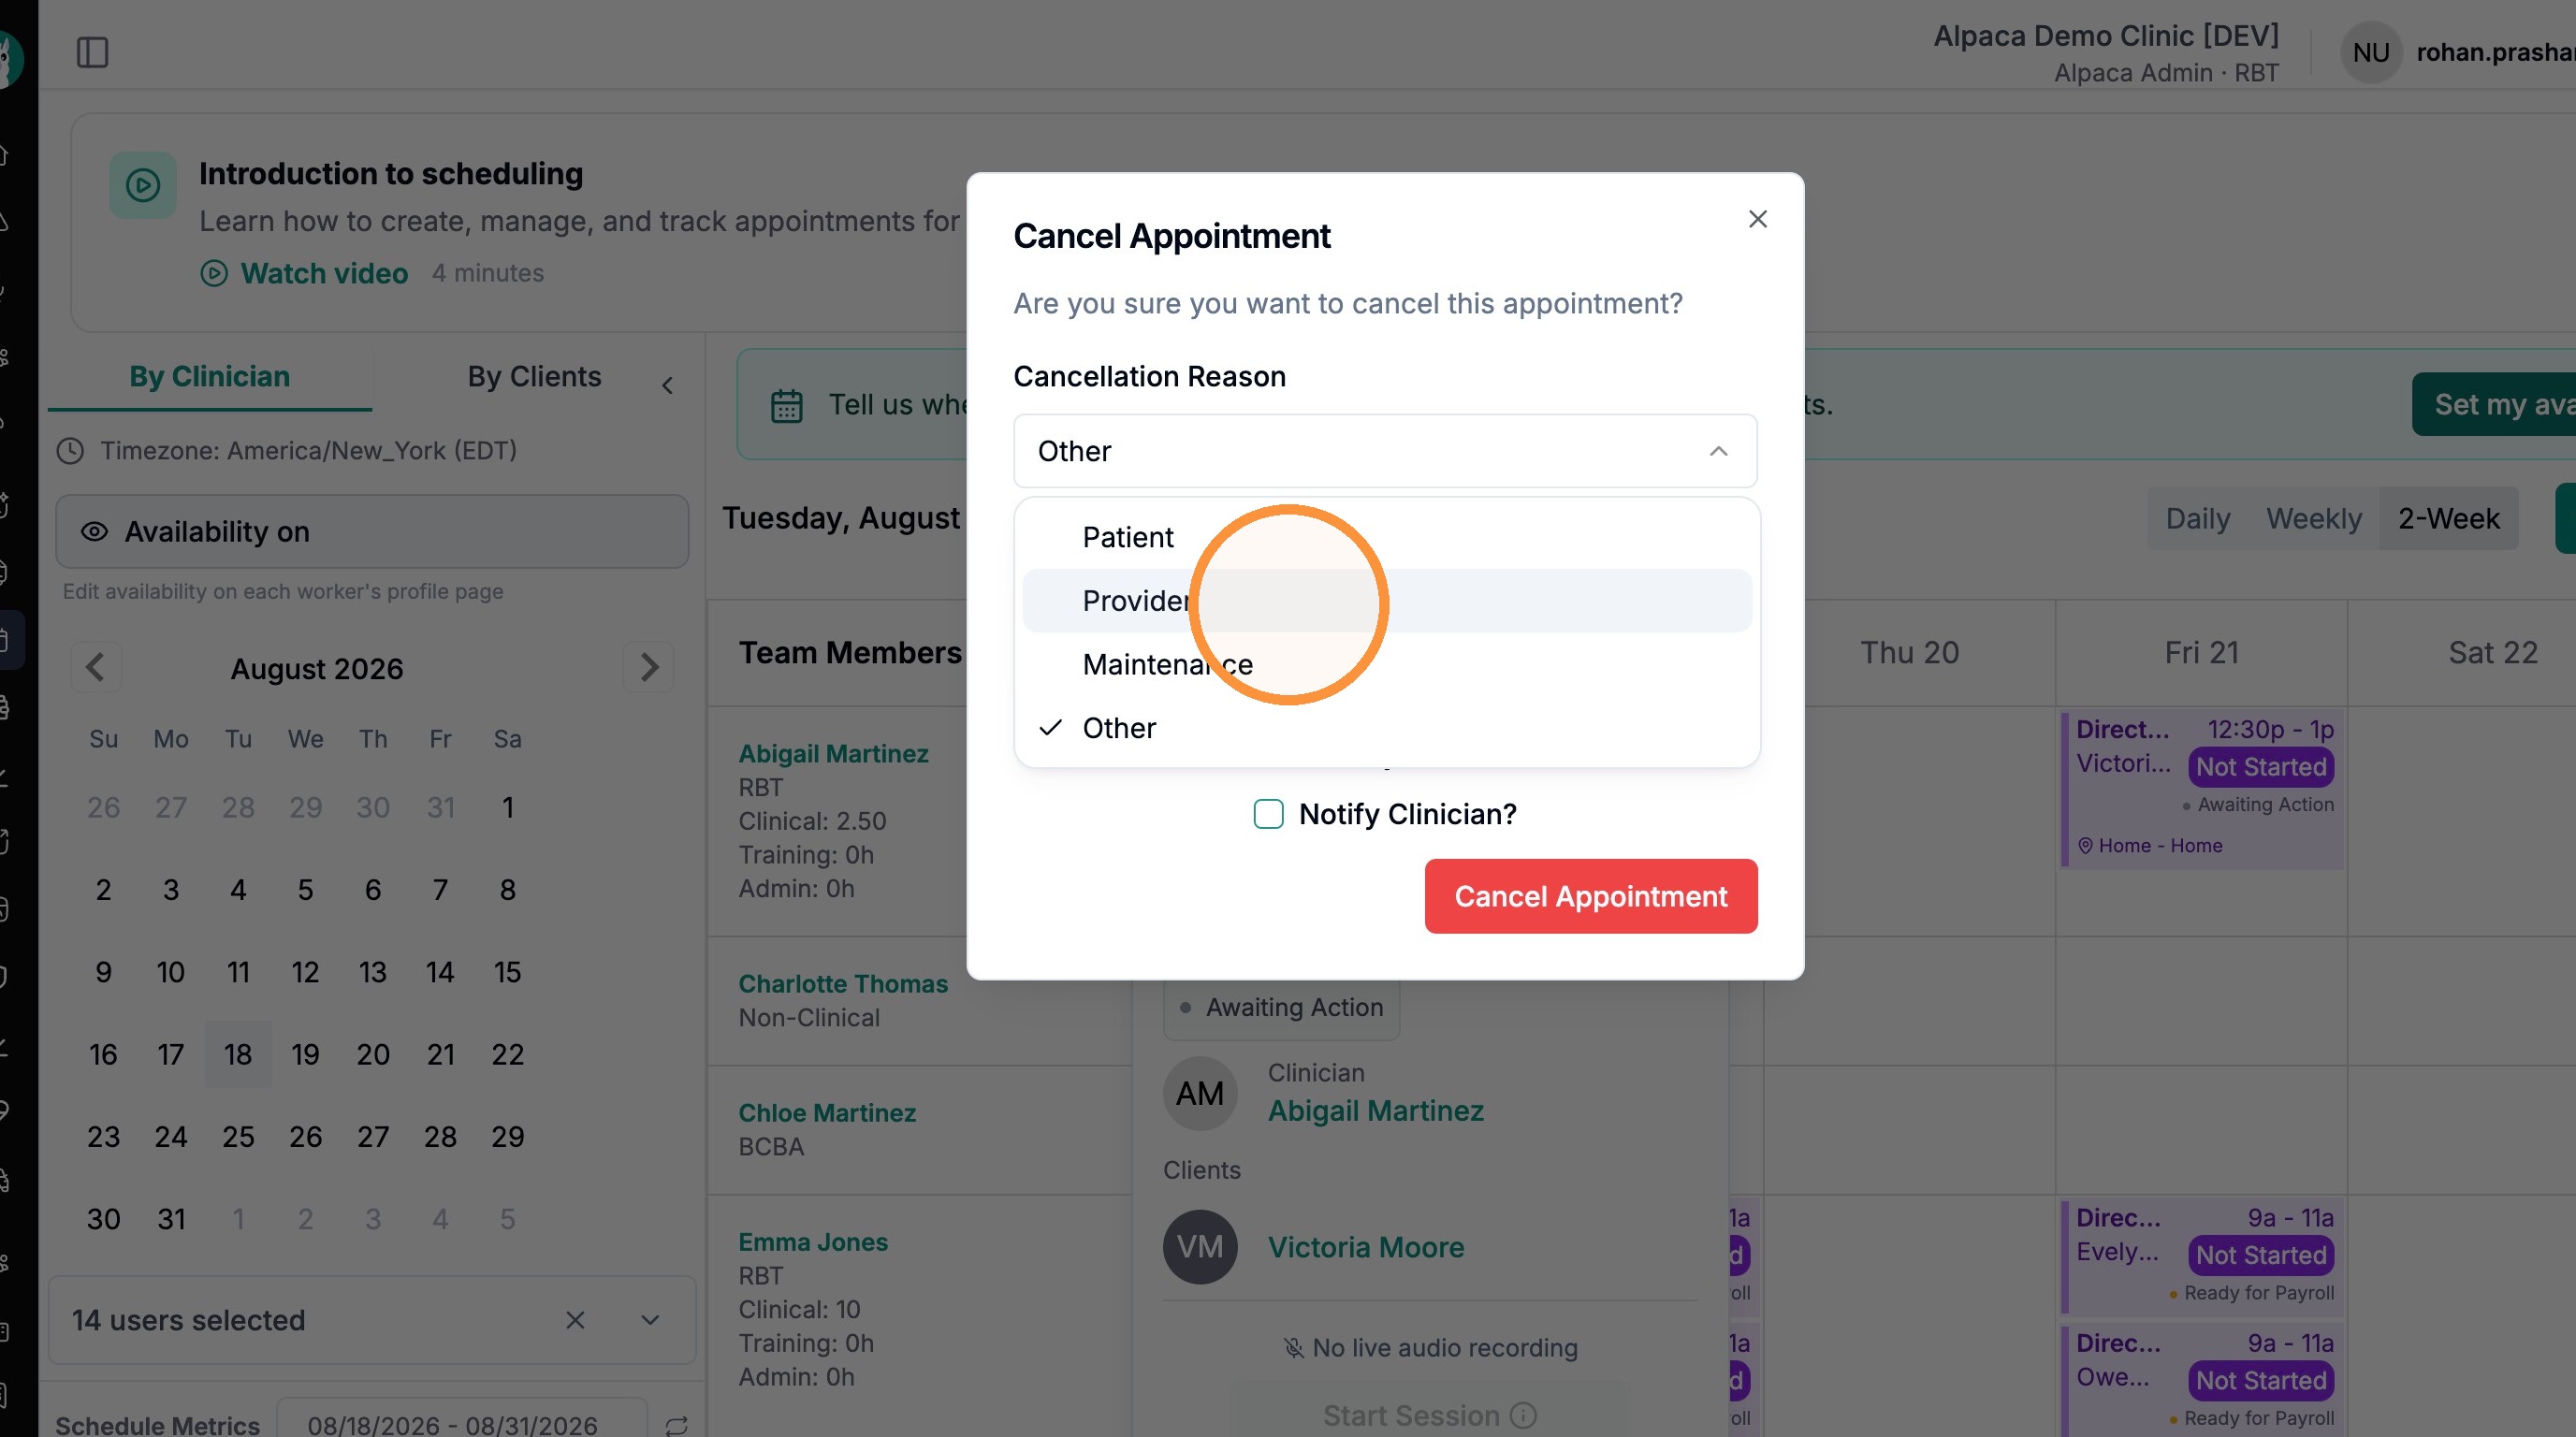
The Cancel Appointment dialog asks you to confirm. Open the Cancellation Reason dropdown and pick the reason that fits: Patient, Provider, Maintenance, or Other (the default is Other). In this example the session is being canceled by the Provider.
Pick the accurate reason: The reason is not just a label - it feeds your clinic's cancellation reporting and insights, so choose the one that truly reflects why the session is not happening.
Step 4 - Add a comment and choose who to notify
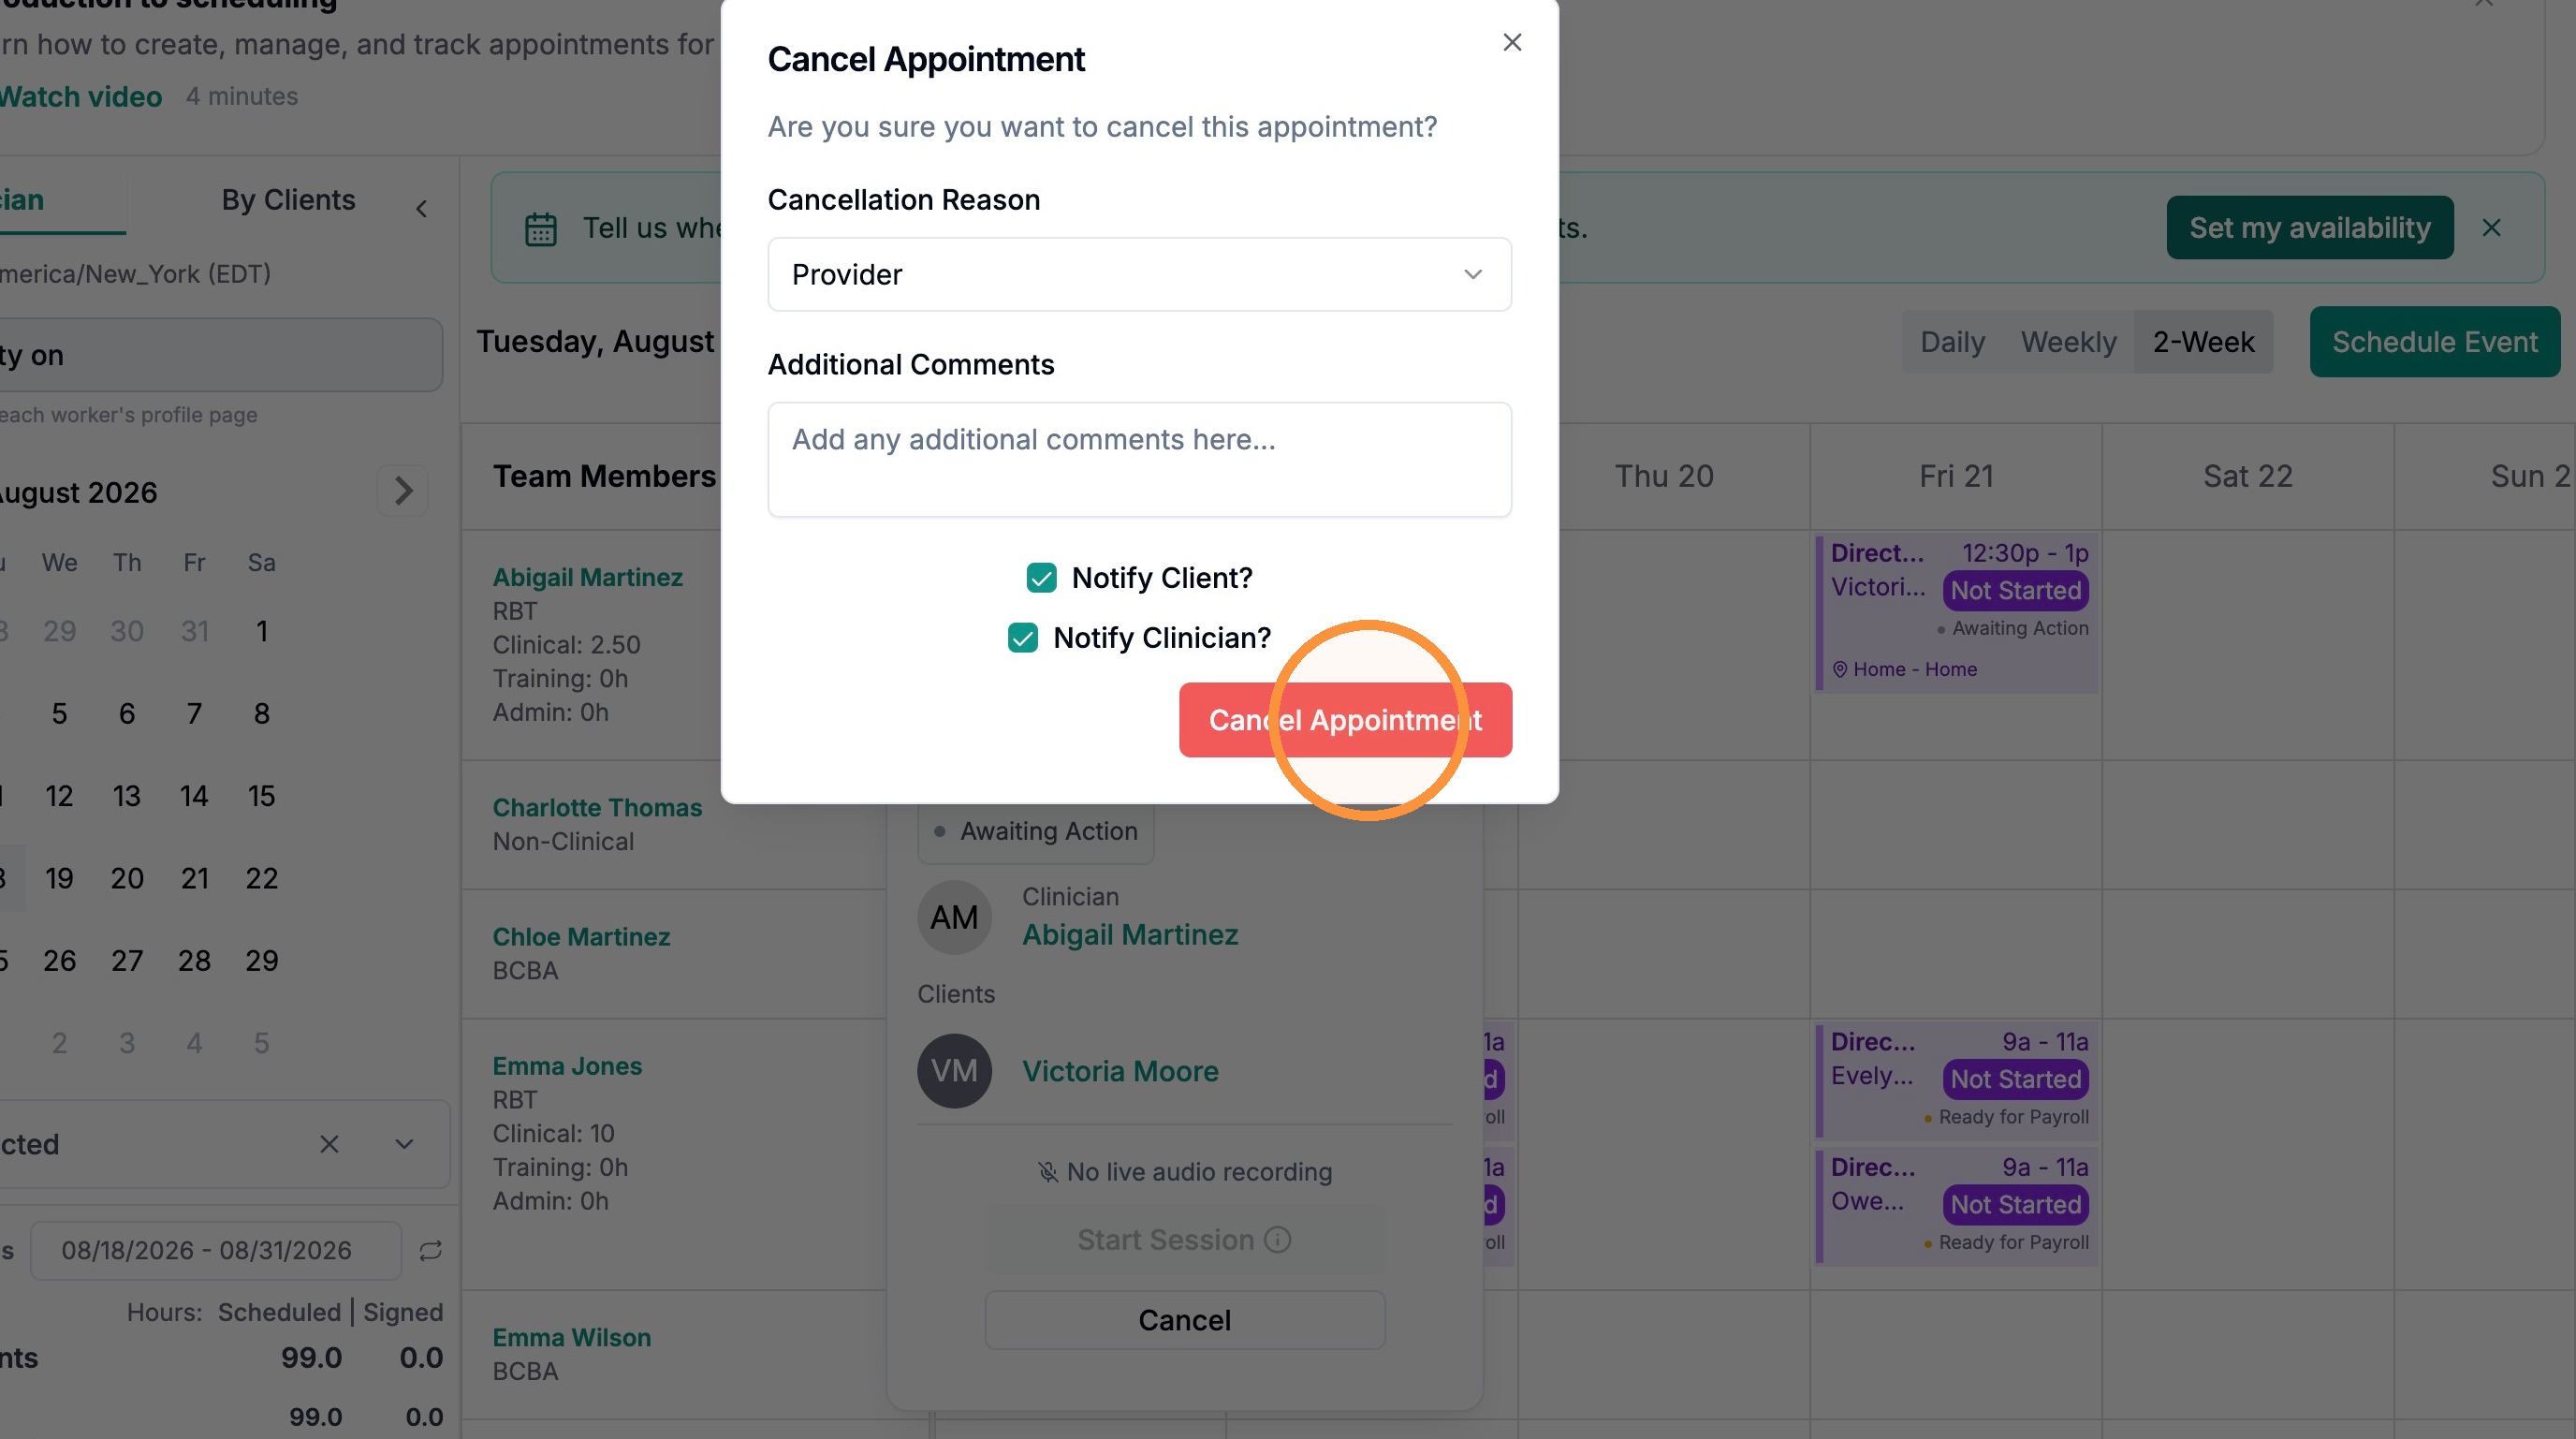
Back in the dialog, you can type an optional note in Additional Comments. Below that are two checkboxes:
Notify Client? sends the client a cancellation notification.
Notify Clinician? sends the assigned clinician a cancellation notification.
Tick whichever people should be told. Leave both unticked to cancel quietly without sending any notification.

Step 5 - Confirm the cancellation
Once the reason and notification choices look right (here both Notify Client? and Notify Clinician? are checked), click the red Cancel Appointment button to finalize it.
The appointment is now marked as cancelled on the schedule. If it was canceled by mistake, you can reopen it from the Schedule and restore it to active - see the "How to Uncancel an Appointment" guide. 📄 How to Uncancel an Appointment