How to Uncancel an Appointment
Last updated: August 21, 2026
If an appointment was canceled by mistake, or plans change and it should go ahead after all, you can restore it directly from the Schedule. Uncanceling puts it back on everyone's schedule as an active appointment.
To see how to cancel an appointment, go to 📄 How to Cancel an Appointment
Step 1 - Open the Schedule and find the canceled appointment
In the left sidebar, under Organization, click Schedule. Use the date range and the Daily / Weekly / 2-Week buttons in the top right to reach the day of the appointment. A canceled appointment appears greyed out with a line through its text (for example, a struck-through Direct Session). You can also spot them in a clinician's summary, which shows a Cancelled: N appts tally. Click the canceled appointment to open it.
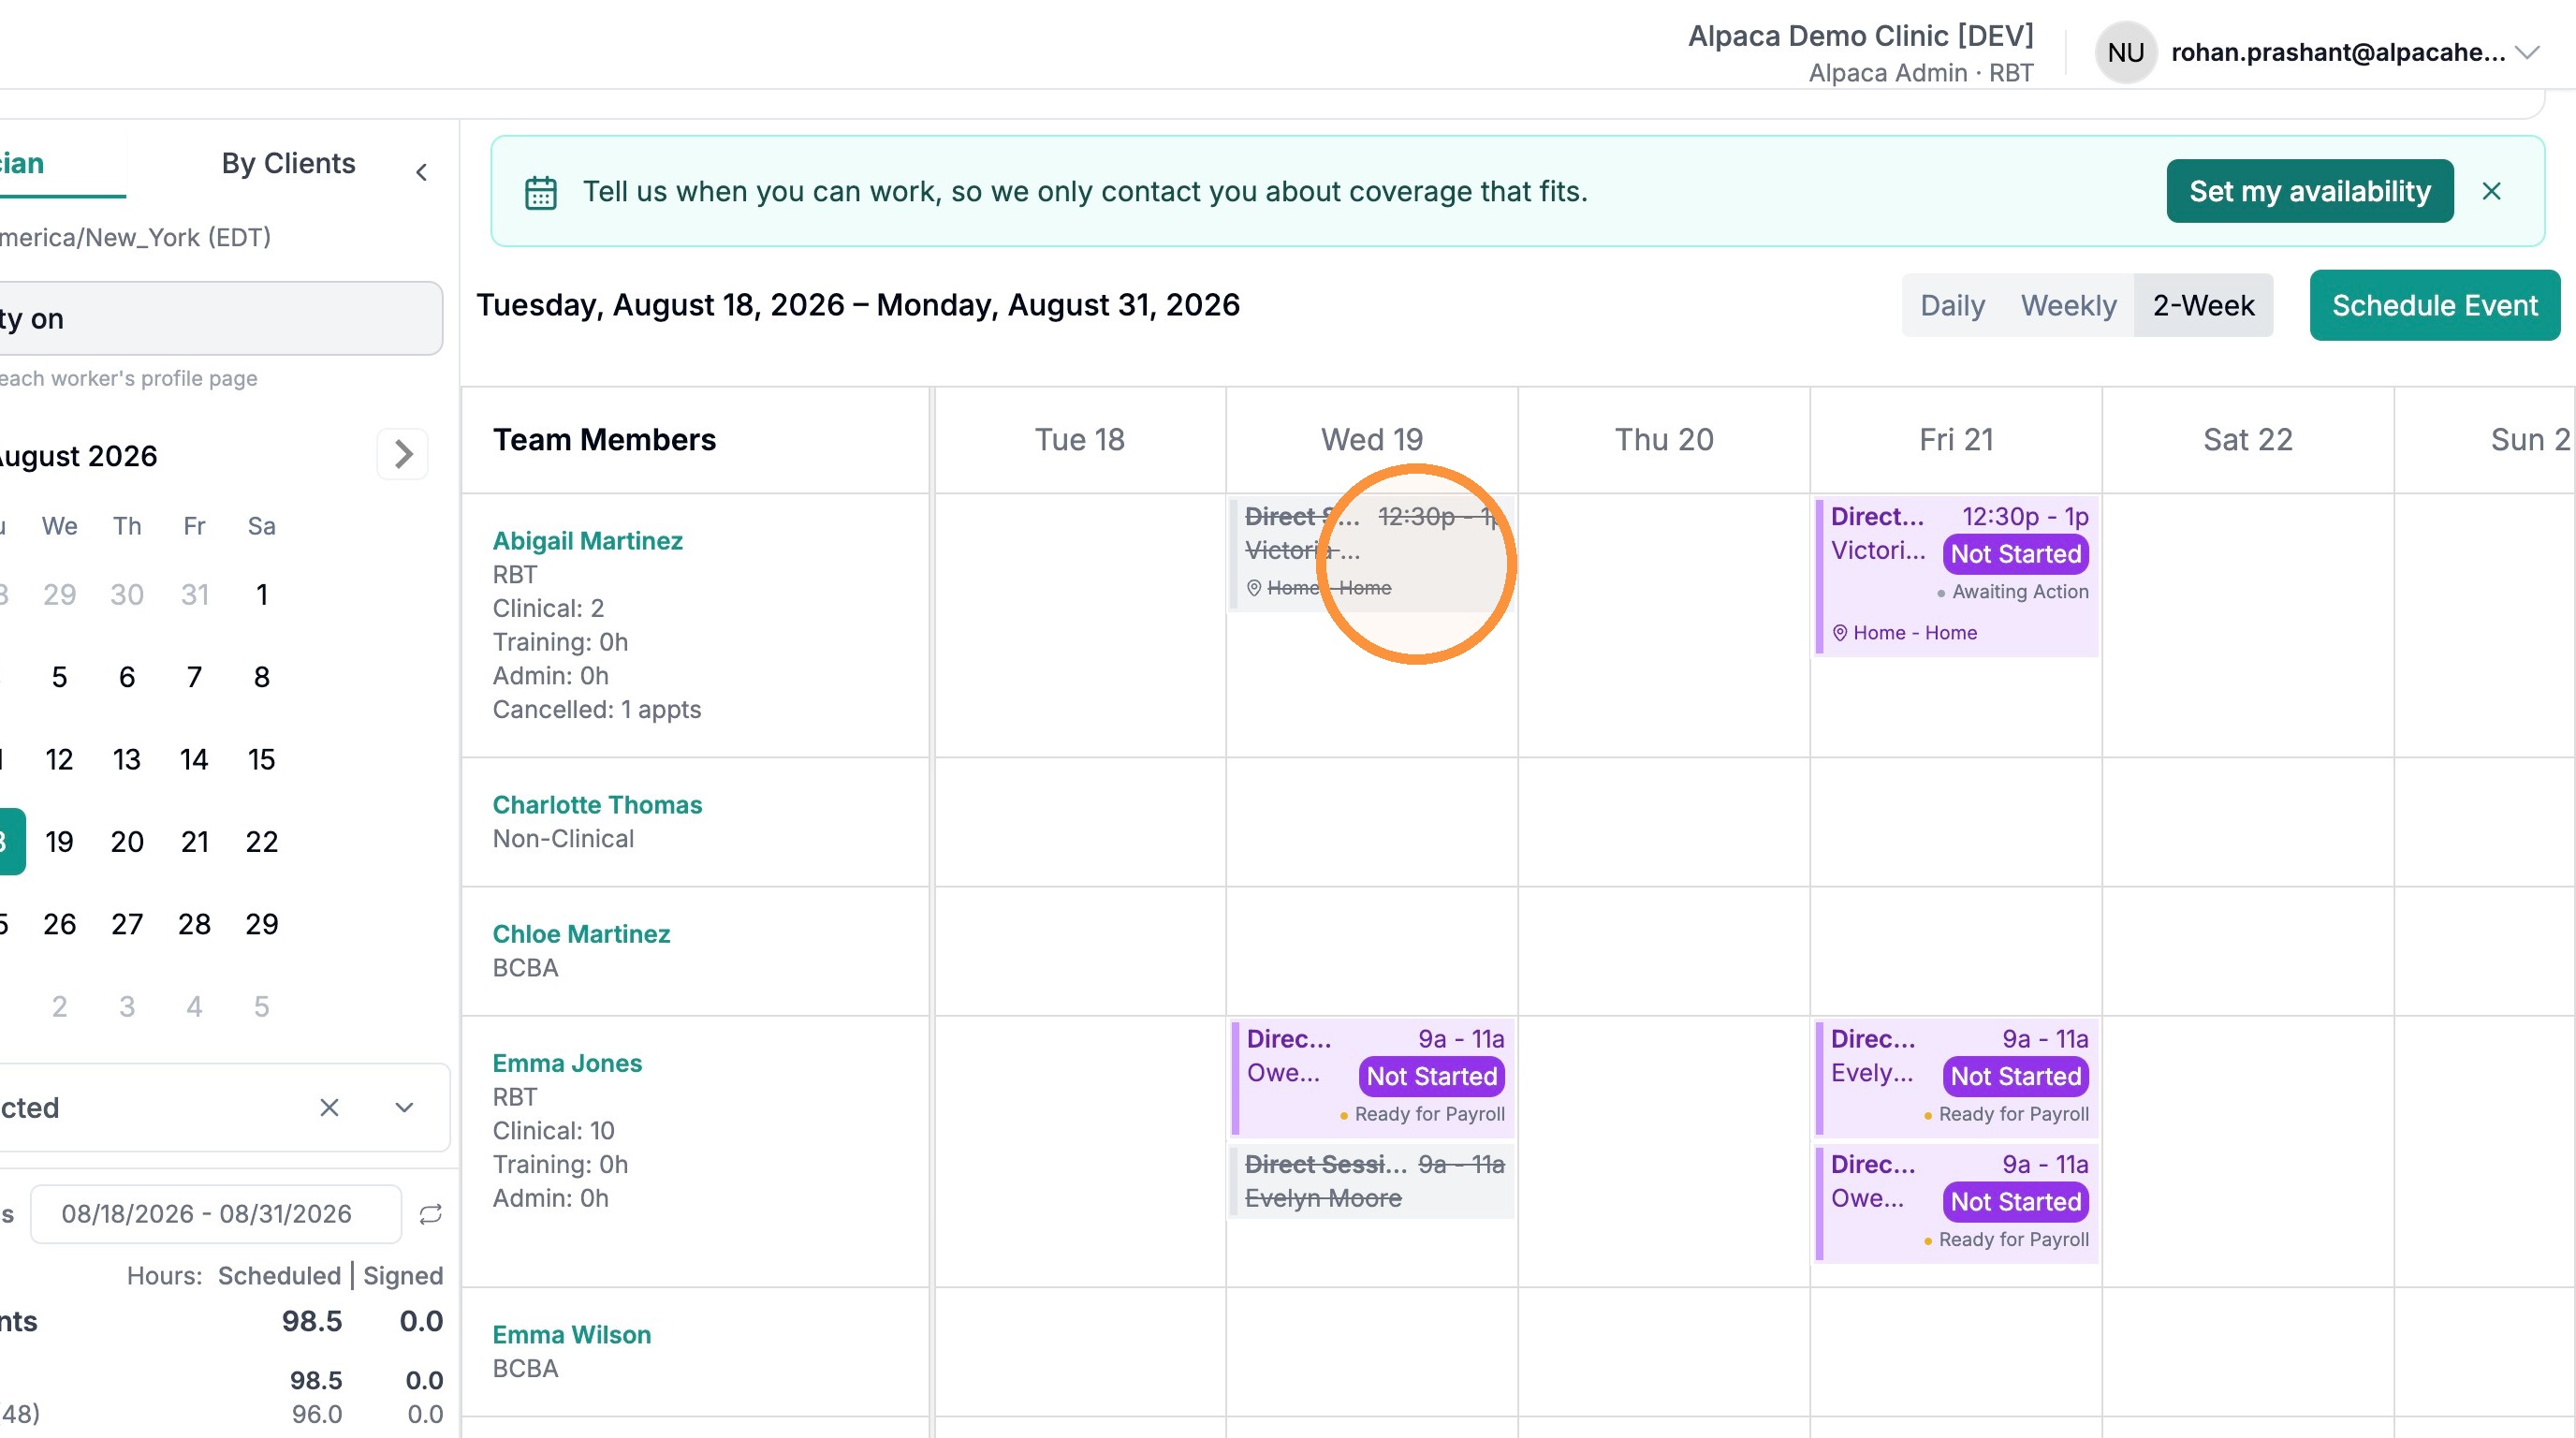
Step 2 - Click Uncancel
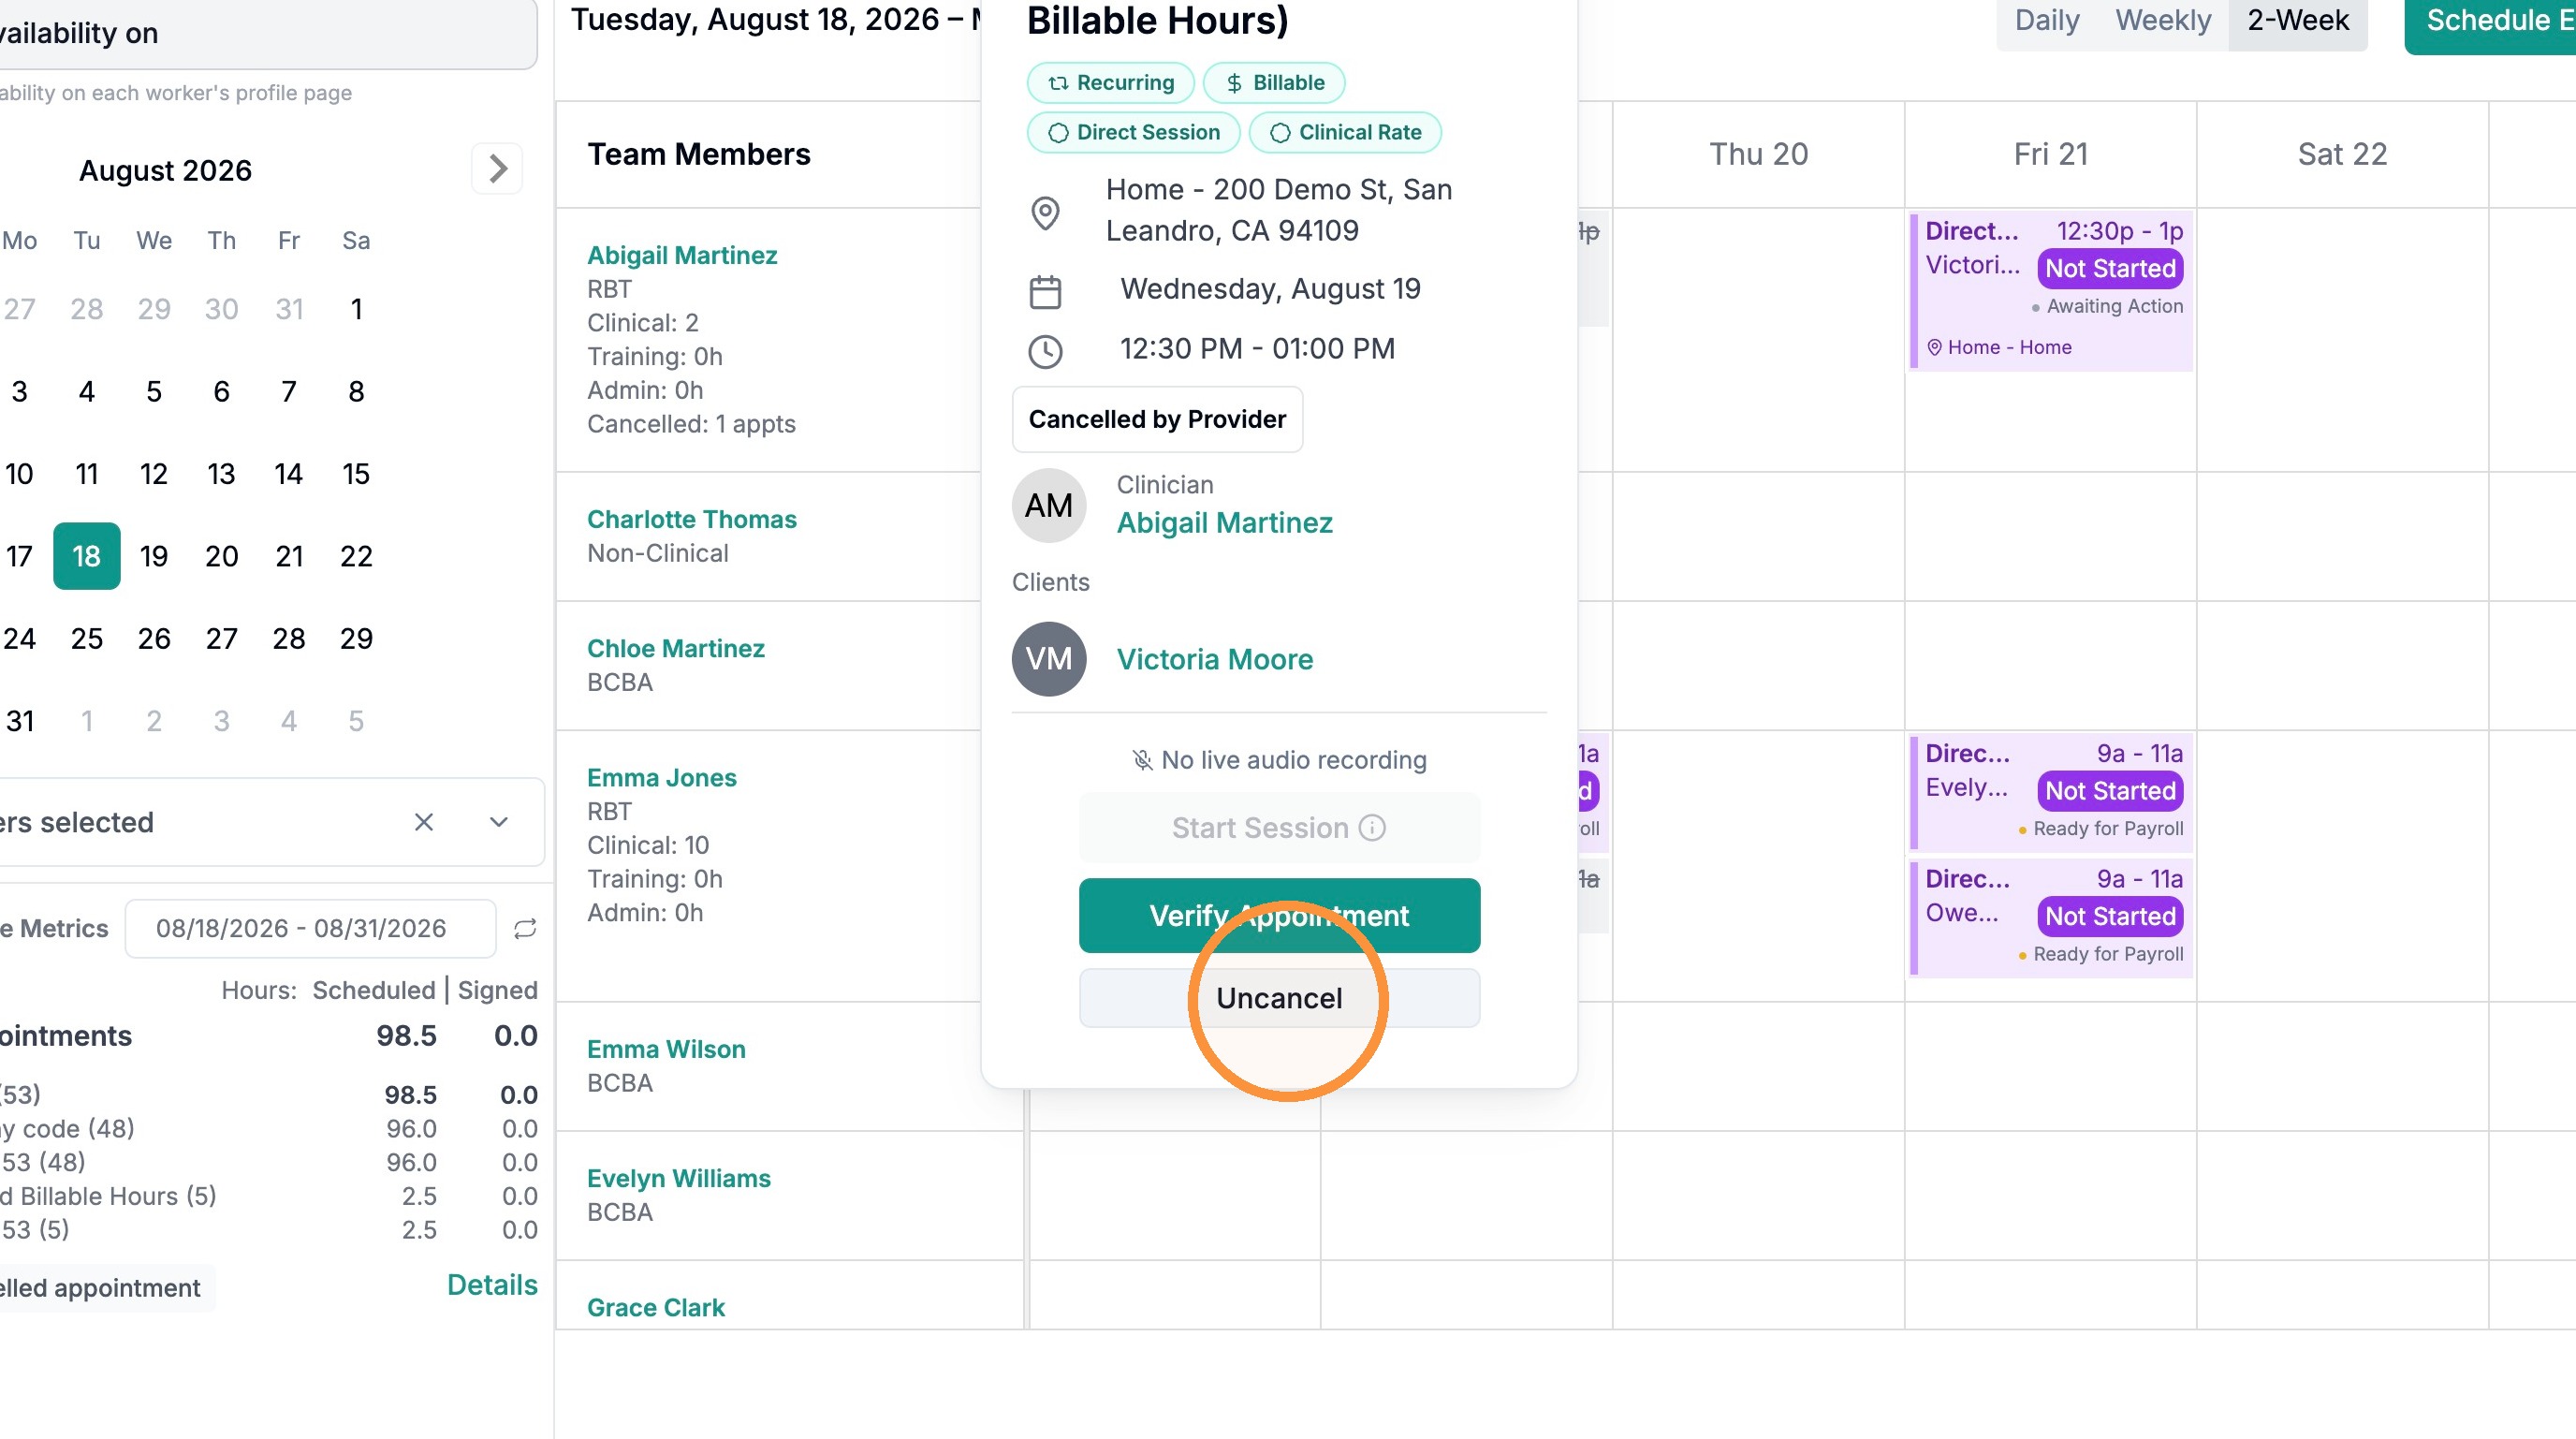
The appointment's details pop up, showing the cancellation reason (for example, Cancelled by Provider), the clinician, the client, and the date and time. At the bottom of the popup, click Uncancel.
Pick the right button: The popup also shows a Verify Appointment button and a greyed-out Start Session. The one you want is Uncancel at the very bottom.
Step 3 - Confirm
A confirmation window asks, "Are you sure you want to revert this appointment to active?" Click the red Uncancel Appointment button to confirm.
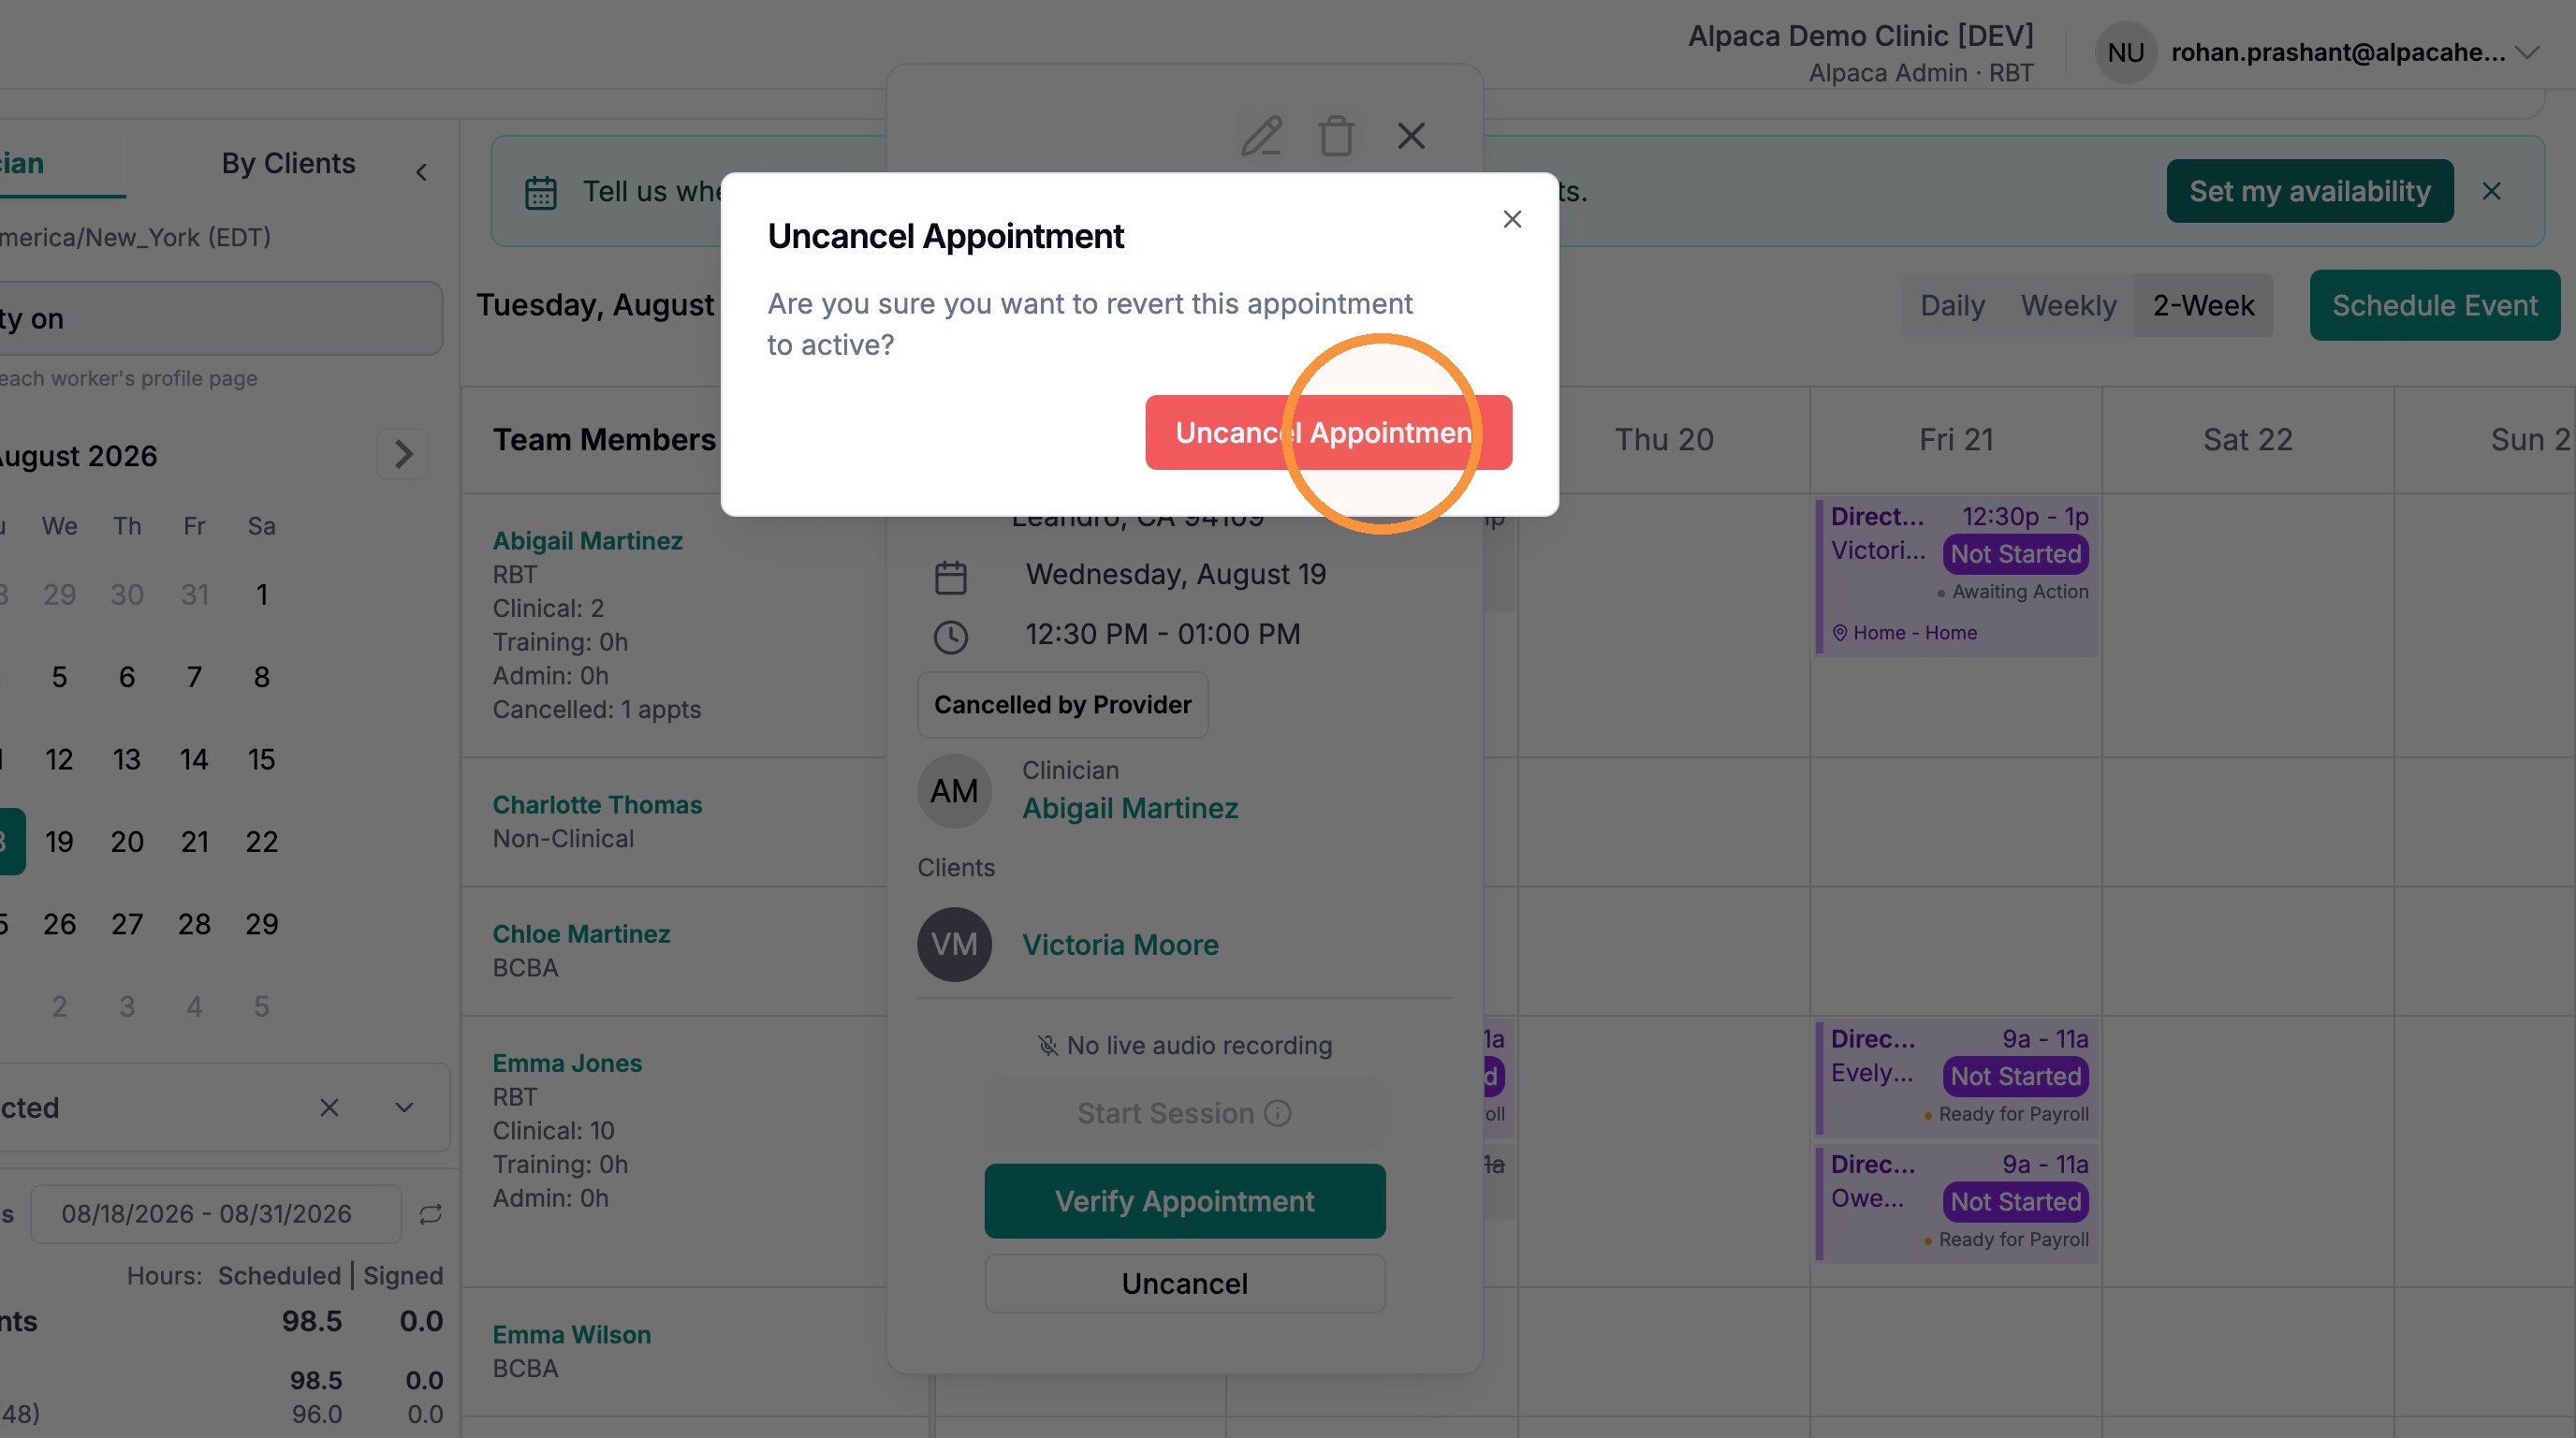
The appointment is now active again and reappears on the schedule (no longer greyed out or struck through) for everyone involved.